Nesting tables for my living room
A few years ago we bought a sectional sofa for our living room. With a historic house, you don't always have large rooms, so I need the maximum amount of seating in a minimum area. So, a sectional entered my life for the first time. Overall I love it, but we have had a issue with side tables. Since I wanted to use the maximum amount of space, side tables are impossible since they would block the walkway. If you sit at the sofa you have to lean forward to place a drink on the coffee table. (I know this doesn't sound like an inconvenience, but we have three large dogs, so our coffee table is about 24 inches away from the sofa to allow for them to run through without removing someone's foot.)
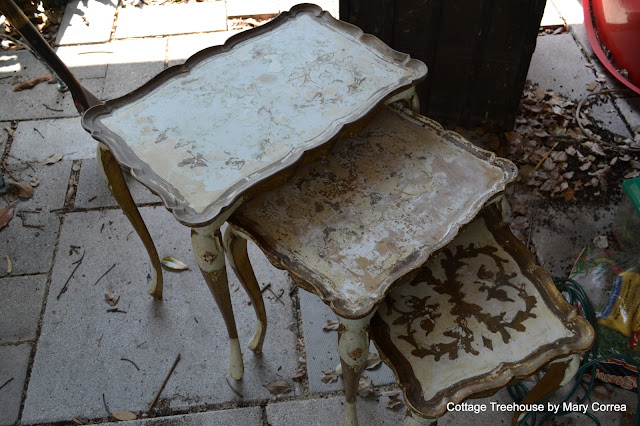
So while shopping one day at one of my favorite local shops, Junk Prince, I found this set of nesting tables.
They were clearly in need of a redo, but for $45 I couldn't resist. They were lightweight, when nested didn't take up any more room than a small table I already had in the living room and could be moved around the sofa when someone need a place for a drink. PERFECT!!!
As with all of my projects, they sat around for a few weeks/months until inspiration struck (plus I was tired of moving them around my work area). I won't bore you with the amount of prep and sanding these tables required, just imagine ALOT.
 I had recently purchased some Webster's Chalk Paint Powder and I was anxious to try it. Webster's is different than the other chalk paints out there because you can mix the powder with any paint. Since I have also developed an addiction to the Valspar samples at Lowe's, I just had to pick which one to use. I settled on Pine Green. You just mix the powder, paint and a small amount of water. After a good coat of primer, I painted 3 coats of my green.
Now someone else may have left them like that and just added a coat of Polyurethane or wax, but I'm not that girl. I love my furniture to look a little old, even if I just painted it. So out comes the sandpaper. I added just a little wear where you would expect to see it, edges, corners, etc.
I also decided to try my hand at a few image transfers. I found a few French typography images over at The Graphics Fairy. She even provides images that are already mirrored so they are ready to transfer right away. I used the Modge Podge method for transferring the images. I Restore Stuff's blog had great instructions for doing this.
After the images were complete, I coated them again with Modge Podge, then set to antiquing the tables. I used my fingers to rub on a lighter green paint in spots, thinning it out with a spray of water where needed. Then I used my trusting antiquing glaze and some gauze to bring out the detail. I prefer to paint this glaze on, let it set a few minutes, then rub/dab it off with gauze. If I want to highlight certain areas, I will go back with the brush and stipple on a little more glaze. Once I was happy with the finish, I added two coats of Polycrylic (letting it dry completely between coats).
I am pretty happy with how they turned out. Now to move them into the living room and get a cup of tea to set on one.


Comments
Post a Comment